Hand-in-hand Walkthrough Web Development.

The Elon Musk saying that goes thus, "If you don't make stuff, there is no stuff", should be your watchword throughout your Web Development journey. If you don't know how to get started or you have started and do not really know how to navigate your journey to being a full-stack web developer? Well, stay glued, as this is for you! This is a perfect time to fill your glass with your favorite drink as we are about to get the ball rolling.
Firstly, we cannot learn something without really knowing what it really is about right? So, let's take a bit of time to define what Web Development is all about. Web Development, as the name implies, is the development of the web. But, it is way deeper than that. Formally, Web Development or also known as Web Application Development is the creation and design of application programs that are based on remote servers and that are accessed by the user's device via the internet. Web applications do not need to be downloaded before it can be used. Examples of this is your Jumia, Amazon and Coursera. I'm definitely sure that we use a web application everyday of our lives as these are what our Google searches redirects us to. You like the sound of that, right? Now, let's find out how we can do that. Web Development is divided into two integral parts.
- The Client Side/ Front-End Web Development
- The Server Side/ Back-End Web Development A combination of both is a Full-Stack Web Developer. Let's take them one after the other and then talk about how they both relate.
The Client Side This is basically what you see immediately you enter the web page. The structure, how beautiful it is, what happens when a button is clicked, what happens when you view the same website on a different device, etc. This comprises of the three fundamental languages.
- HyperText Markup Language (HTML)
- Cascading Style Sheets (CSS)
- JavaScript Prerequisites Before, you can start developing, you need a code editor like Visual Studio Code, Atom, Sublime Text among others and a web browser like Google Chrome and Firefox. I would personally recommend Visual Studio Code. This is because it has some extensions built into it which makes programming easier and faster. Trust me, a programmer that does not use Visual Studio Code does twice the work. I also recommend Google Chrome as your choice of your web browser. This article is going to be based on Visual Studio Code. When your code editor has been installed, then you can now start coding. Take a deep breath as you are at the starting point of greatness at the tip of your fingers.
HyperText Markup Language (HTML)
This is starting point of your front end development career path. This is the skeleton or structure of your webpage. Its is all about what you want on the webpage. This can easily be the easiest language you might ever see. But arguments have risen that HTML isn't a real programming language and I very much agree. This is because it should be referred to as a structure language. It has no conditional statements, loops and all fundamentals that make up a programming language.
Note: This article is based on HTML5.
It contains tags like buttons, tables, links, just to name a few which can be given properties like classes and id's for unique selection.
You can either create a file by right-clicking on the desktop page, and then clicking on new folder and then give it your preferred name.
And then, right-click on your newly-created folder and then you should see an "Open with Code" option and then click on it.
OR
Go to the top right of your screen right beside the icon, click on the "File" option and the create it and give it your preferred name. Doing it either way would give the same result.
Right under the "Explorer" text, you would see the name of your file, and then when you hover, some icons would be displayed. Click on the first to the left, you would have to name this.
The name must end with a .html, so as to tell the code editor that it is an HTML file.
Type the exclamation mark and then click on enter. This is the first magic of Visual Studio Code.
Let's explain what is displayed.
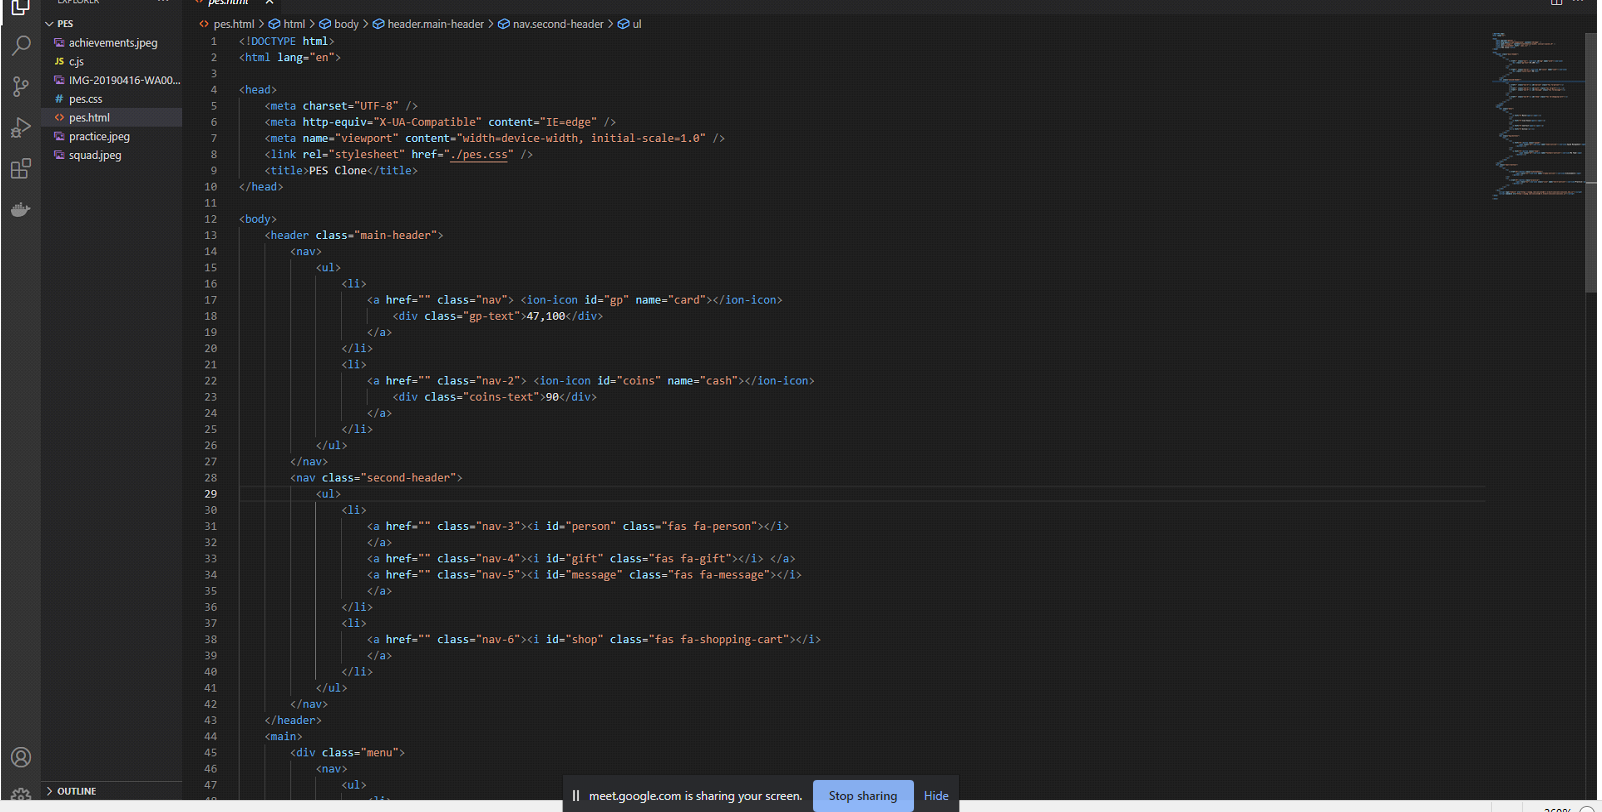
Firstly, you see a <!DOCTYPE html> at the top of the screen, this just means that the type of the document is an HTML document.
Secondly, we have an html tag which specifies the language you are going to be writing your code in."en" for English, "fr" for French and so on.
Then you have a head tag.
This stores the fundamentals that helps the code to work well, like the character sets, scale, and name. The mentioned components are stored in meta sub-tags in the head tag.
There is another part of the head tag. They are the links.
This is if you have an external CSS file, you connect both pages with the stylesheet link in the head tag.
And then, to wrap up the head tag, we have the title of the document. This is the what displays on the tab of that document when opened in the browser.
Abd then we have the body tag.
This is where all the code we are going to write would be contained.
Ranging from tags like headers, links to the web or other non-CSS pages, divs(short for divisions), scripts to write JavaScript, buttons, tables, media items (images and videos) and many more.
For more HTML tags https://www.w3schools.com/tags/
An HTML page
 Displaying your code
This is the job of the web browser.
This is also made easy by Visual Studio Code.
This is done by an extension known as "Live Server" made by Ritwick Dey.
Installation
On the extreme left of the Visual Studio Code page, click on the icon with four boxes(when you hover on it, it displays extensions as a confirmation). The main essence of this extension is that it launches the server with a live reload as the code is saved.
Displaying your code
This is the job of the web browser.
This is also made easy by Visual Studio Code.
This is done by an extension known as "Live Server" made by Ritwick Dey.
Installation
On the extreme left of the Visual Studio Code page, click on the icon with four boxes(when you hover on it, it displays extensions as a confirmation). The main essence of this extension is that it launches the server with a live reload as the code is saved.
Usage This is pretty simple. Just right-click anywhere on your code and then a drop-down would be displayed, and if the extension has been successfully installed, an option "Open with Live Server" would also be displayed. This is would display the result of your code on your default browser. OR On the extreme bottom of the code page, a Go Live option would be displayed there. Click on it, and you have the same result. That's basically it for HTML. I hope you enjoyed it as much as I did.
Cascading Style Sheets(CSS)
This is all about the beauty and style of your webpage. It covers concepts like Grid, Flexbox, Animations, and all general design effects. If you have a knack for colors and designs, then CSS is for you. Also, CSS has frameworks like SASS, LESS, and most popularly known, Bootstrap. These are just making regular CSS easy to use and doing more things with a more understandable and less code. So learn them at your will. It's a language you'll like so make sure you learn it very effectively. Note: This article is based on CSS3. CSS styles by selection.
- for the whole page tag names (for example buttons) root class and id names children tags
Classes are referred to in CSS by using a '.' before the class name. Id's are referred to in CSS by using a '#' before the id names. In the case of styling a particular part of a class, for example, a button inside a class, you use a space to separate the different selectors. The CSS code configuration looks like this :
- { box-sizing: border-box; overflow: hidden; padding: 0; margin: 0; } How CSS is used CSS can be used in three ways. Inline Internal External Inline CSS This is when an HTML tag is created and the style attribute is called on it directly. It would result in code looking like this; But this is not a good practice as adding more and more features to it would be harder and more complicated. So, this is generally not used.
I hope you are as pumped as I am in this journey, as you would not want to miss subsequent posts. Next week is not a long time to wait, is it?

